 Holding & Shipping Orders Using Delayed & Reserve Hold
| Document Version | v.6 |
|---|---|
| Document Last Updated | 11/10/2024 |
| Software Version Documented | v.10 |
Overview
This document details the best practices for holding and storing customer orders that are scheduled for shipment at a later date. The preferred approach involves utilizing Delayed Order processing, Reserve Hold, or a combination of both. This method is for businesses that do not pick, pack, and stage materials prematurely in your warehouse before customers are ready to receive their shipments.
Implementing these practices allows you to effectively manage inventory, optimize warehouse space, and enhance customer satisfaction by ensuring flexible and efficient order handling.
The below sections will go over three scenarios and Savance’s recommended workflow for all, as well as some other common scenarios.
The Benefits of Order Holds
Before we go into the workflow process it is important to understand the benefits of these holds and how they will be incorporated into your operations.
Delayed Order (DO)
The Delayed Order system offers several unique benefits:
-
You can place an entire order as a Delayed Order and set a future due date. This allows you to avoid allocating inventory or placing orders for special items until closer to the customer’s due date.
-
You also have the option to apply Delayed Order at the item level, aligning receiving dates with special-ordered items. When the due date arrives, available materials will automatically trigger a pick ticket (PT) for warehouse processing, or if using Reserve Hold in conjunction with DO, will reserve the material for the order, allowing you to release it when the customer is ready.
-
To ensure accuracy, it's important to maintain up-to-date lead times and receive materials promptly. Additionally, configure any necessary buffer times with vendors to prevent delays. As the system uses the following calculation
Due Date - (Buffer Time + Lead Time) to decide when an order gets allocated and when items show up in Critical Purchasing to be purchased.
If you are going to use this hold you can have it automatically check in the orders header by going to Settings> General Settings> System and selecting ‘Automatically check order’s header DO’ and or ‘Automatically check orders header DO if RH is checked’ if you are using a combo of Delayed Order and Reserve Hold.

Reserved Hold (RH)
Reserved Hold gives you control over when an order is released to the warehouse for processing. While the inventory is still "reserved" and allocated to the order, no pick tickets are automatically printed, even when the order is fully available.
This system allows the inventory to remain in its original warehouse locations until you're ready to have it picked, eliminating the need for a separate staging area for prepared orders.
A key advantage of Reserved Hold is that the quantities on hold still generate demand. These quantities will appear in Critical Purchasing, ensuring they are factored into stock replenishment or order fulfillment as needed.
If you are going to use this hold you can have it automatically check in the orders header by going to Settings> General Settings> System and selecting ‘Automatically check order’s header RH’ and or ‘Automatically check orders header DO if RH is checked’ if you are using a combo of Delayed Order and Reserve Hold.

Create Warehouse Locations
To begin you will need to make sure you have created all your warehouse locations in the warehouse manager. This is especially important when using the Temporary Location functionality.
-
Go to Inventory>Warehouse Manager> Location Management.

-
Any item that does not have a location, will automatically be assigned to the **NO LOCATION**
Update your Spreadsheet Admin
Another configuration you should consider is the spreadsheet admin. In a later step of the process, you will be updating your Due Date, and by adding the ‘Due Date’ column within your spreadsheet this will give visibility of when the customer’s approximate due date for their order is.

-
To add this column if not already visible, go to Settings> Spreadsheet Admin

-
Make sure the Order Type is on Quote/Order
-
Next, select the Show All button to view all available columns for this grid.
-
Find the ‘Due Date’ column, and make sure that the ‘Show Column’ checkbox is checked.

-
Then while the ‘Due Date’ column is highlighted use the <- and -> to move the column in the preferred place in the grid.
-
Once you’ve made your changes, select ‘Save’ or ‘Save As’ to update your changes.
General User Settings
Using Reserve Hold (RH).
-
If you are going to use this hold you can have it automatically check in the orders header by going to Settings> General Settings> System and selecting ‘Automatically check order’s header RH’ and or ‘Automatically check orders header DO if RH is checked’ if you are using a combo of Delayed Order and Reserve Hold.
Using Delayed Order (DO)
-
If you are going to use this hold you can have it automatically check in the orders header by going to Settings> General Settings> System and selecting ‘Automatically check order’s header DO’ and or ‘Automatically check orders header DO if RH is checked’ if you are using a combo of Delayed Order and Reserve Hold.

Scenarios
The below section will cover the three different scenarios in which you are placing an order for a customer now, but the customer is not ready for delivery for sometime later.
Scenario 1 ) You do not want any pick tickets (PT) to print for the material you have available.
In the scenario where you don’t want to pick and stage the material you have available, you will release the material and create a PT when the customer is ready to receive their order.
**
Recommend Workflow: RH (Reserved Hold)**
Order Entry Process
- In the order header, you will select ‘RH’ for Reserve Hold.

-
For reference, Reserve Hold, once the order is converted the system reserves material on the order but doesn’t create a shipper for the order until one is manually created. RH will increase your Reserved, and Reserved Hold Allocated and decrease from your Available within your warehouse inventory log.
-
Next, within the order header select the approximate due date that this customer will need or like their order by.

-
Continue your normal order process.
-
Once the order has been converted NO pick ticket will be created for your available items.

**
Release/Warehouse Process
**
When the customer is ready for their order to be released you will first Open their order, and then select the ‘Status’ tab to go to Release Management.


-
Select ‘Release Management’

-
In the Release Management screen, you will select which items you are ready to pick and deliver to your customer.
-
To Release some of the order enter the Quantity you are releasing in the column of the item.


-
To Release the whole order select ‘Force Out Available Only’

-
As you do either option, the shipper you are about to create will appear under the ‘Shipper to Allocated Details section.
-
When done, select ‘ Allocate Shipper’

-
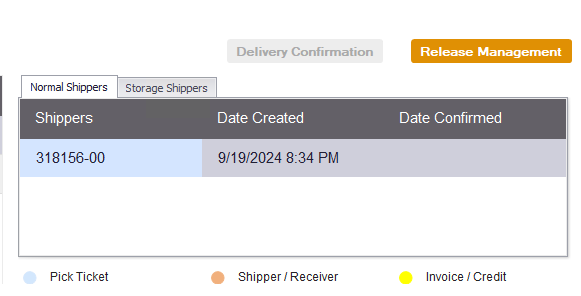
This will create a PT which will print for the warehouse.
-
The Warehouse will then pick all, ship all items, and post it loaded/delivered.

Scenario 2 ) You do not want any pick tickets (PT) to print for the material you have available and need to place a PO from the Vendor.
In the scenario that you don’t want to pick and stage the material you have available, and need to place a PO for other material, and will release some or everything (create PT) when the customer is ready to receive their order.
Recommend Workflow: RH (Reserved Hold)
**Order Entry Process
**
- In the order header, you will select ‘RH’ for Reserve Hold.
-
For reference, Reserve Hold, once the order is converted the system reserves material on the order but doesn’t create a shipper for the order until one is manually created. RH will increase your Reserved, and Reserved Hold Allocated and decrease from your Available within your warehouse inventory log.
-
Next, within the order header select the approximate due date that this customer will need or like their order by.
-
Continue your normal order process.
-
Once the order has been converted NO pick ticket will be created for your available items.
-
For the material that needs to be ordered, the purchasing process will take over, and a PO will need to be created for the material you need to order.
**
Receiving Process**
When it is time to receive the warehouse receiver will find and open the receiver.
-
Print a receiver document, by selecting the ‘Print’ button in the top right corner.

-
This receiver document shows (similar to the put away) the list of items on that receiver and will allow the warehouse employee to write down how many were received and the location they are putting the material away to.

-
As you are entering the information from the receiver document into Savance, you will enter the quantity received as well as the location in which the receiver put it away to.
-
To select the Put Away location of the items select the “..’ next to the Put Away Location column

-
Next, in the Put Away locations screen, choose the location from the drop-down menu.
- NOTE: If you are using the Temporary Location functionality the drop-down location listing will appear. If not, you will need to edit the locations as normal.


-
After this step, the ‘Hold for Backorders’ screen will appear.

-
This screen will allow you to print any labels, as well as to inform you what items that were received were for what orders you have holding.
-
Select Ok on the Hold for Backorders screen, the system will automatically increase your Reserved Allocated by the item and qty.
- **NOTE: Since you are using (RH Reserve Hold) there is no need to go to the ‘Process Backorders’ screen.
**
- **NOTE: Since you are using (RH Reserve Hold) there is no need to go to the ‘Process Backorders’ screen.
-
Finally, Post to ‘Put Away’ and save and close the receiver when completed.

**Release/Warehouse Process
**
When the customer is ready for their order to be released you will first Open their order, and the select ‘Status’ tab to go to Release Management.
-
Select ‘Release Management’
-
In the Release Management screen, you will select which items you are ready to pick and deliver to your customer.
-
To Release some of the order enter the Quantity you are releasing in the column of the item.
-
To Release the whole order select ‘Force Out Available Only’
-
As you do either option, the shipper you are about to create will appear under the ‘Shipper to Allocated Details section.
-
When done, select ‘ Allocate Shipper’
-
This will create a PT which will print for the warehouse.
-
The Warehouse will then pick all, ship all items, and post it loaded/delivered.
Scenario 3 ) You want to Delay Processing the Order
In this scenario, there is a while before the customer needs their order, so there is no need to allocate material, pick, and stage the order now, as well as there is no need or rush to place a PO for any non-stock or special buy items.
Recommend Workflow: DO (Delayed Order) and RH (Reserved Hold) in the Header
**Order Entry Process
**
-
In the order header, you will select DO (Delayed Order) & RH (Reserve Hold)
- NOTE: you can also select DO (Delayed) at the line item level as well.

-
For reference: Reserve Hold, once the order is converted the system reserves material on the order but doesn’t create a shipper for the order until one is manually created. RH will increase your Reserved, and Reserved Hold Allocated and decrease from your Available within your warehouse inventory log.
-
The Delayed Order feature allows you to enter a sales order in the system well before the material is due and that material won’t be allocated OR flagged for purchase until a date in the future.
-
Next, within the order header select the approximate due date that this customer will need or like their order by. NOTE: This date can also be updated at the line level as well.
-
Continue your normal order process. Once the order is converted it will be on hold, until the Due/Delivery date has been met.
-
For any items that are already available and have been flagged Delayed Order, they show reserved, but the “reserveholdallocation” wont happen until that due date has been reached.

**Purchasing Process
**For the items that have been flagged as DO (Delayed Order) to be purchased later as soon as the Due Date - (Buffer Time + Lead Time) for the vendor is calculated the demand for those items will appear in Critical Purchasing to be purchased for the order.
 - The normal PO creation process will take over.
Receiving Process
When it is time to receive the warehouse receiver will find and open the receiver.
-
They will print a receiver document, by selecting the ‘Print’ button in the top right corner.
-
This receiver document shows the list of items on that receiver and will allow the warehouse employee to write down how many were received and the location they are putting the material away to.
-
As you are entering the information from the receiver document into Savance, you will enter the quantity received as well as the location in which the receiver put it away to.
-
To select the Put Away location of the items select the “..’ next to the Put Away Location column
-
Next, in the Put Away locations screen, choose the location from the drop-down menu.
- NOTE: If you are using the Temporary Location functionality the drop-down location listing will appear. If not, you will need to edit the locations as normal.
-
After this step, the ‘Hold for Backorders’ screen will appear.
-
This screen will allow you to print any labels, as well as to inform you what items that were received were for what orders you have holding.
-
Select Ok on the Hold for Backorders screen, the system will automatically increase your Reserved Allocated by the item and qty.
- **NOTE: Since you are using (RH Reserve Hold) there is no need to go to the ‘Process Backorders’ screen.
**
- **NOTE: Since you are using (RH Reserve Hold) there is no need to go to the ‘Process Backorders’ screen.
-
Finally, Post to ‘Put Away’ and save and close the receiver when completed.
**Release/Warehouse Process
**
When the customer is ready for their order to be released you will first Open their order, and the select ‘Status’ tab to go to Release Management.
-
Select ‘Release Management’
-
In the Release Management screen, you will select which items you are ready to pick and deliver to your customer.
-
To Release some of the order enter the Quantity you are releasing in the column of the item.
-
To Release the whole order select ‘Force Out Available Only’
-
As you do either option, the shipper you are about to create will appear under the ‘Shipper to Allocated Details section.
-
When done, select ‘ Allocate Shipper’
-
This will create a PT which will print for the warehouse.
-
The Warehouse will then pick all, ship all items, and post it loaded/delivered.
Other Common Sales Scenarios
Stealing Material from Another Order
Following the Sales Process above for entering orders, if you have an item with 0 availability, but you know you have other orders on hold that have this item available, you will follow the below process to steal the material.
-
If an item shows 0 availability but you know you have it in stock allocated to other orders you will open within the order open the In Basket > Part Info > and select the Inv. Status button.

-
In the Inventory Status screen, you will look for “Staged” orders to view where you could potentially “Steal” From.

-
Review the Due Date column and determine if you can indeed “steal” from any of the orders and write down that order number.
-
Next, go into Release Mgmt on the newly processed order.

-
Since you already determined you need to steal from another order to process and ship this one you will locate the item(s) in the “Not Released” section of this screen and select “Take/Force”

-
From this screen Select “Search Other Orders for Material”


-
Again review the orders, and their due dates to determine the best order you should steal from.
-
Next, once you’ve selected your order, note the location of where that material is and where you will need to go retrieve it from, select ‘Shipper Allocated’, and then select ‘Accept’.

-
Lastly, if you need to merge the shippers select ‘Merge All’ and a brand new shipper will print with all items ordered.


-
Select Allocated Shipper.
-
A new merge shipper will be created for the warehouse to process.
Partial Shipping the Order
When the customer is ready to pick up or have delivered some of their order here are the steps on how to handle this.
-
Search and open the customer's order, and go into the Release Mgmt Screen.

-
Review the items on the shippers, and select which ones the customer wants, by selecting ‘Merge’
-
As you do this, the Shipper to Allocate section will begin tallying the items you wish to have leave the warehouse.
-
In addition, you will also notice where these shippers are staged. Please note this information before you proceed, as when you create a new shipper the system will assume you are picking the material from its original location.

-
If you wish to have a new Print ticket printed you can also select that option as well for this newly created (merged) PT/Shipper.
-
Once you are done selecting the items you wish to ship, select ‘Allocate Shipper”.
-
A new shipper will be generated with the items you are merging, and the rest of the items will remain on their original shippers.


Viewing Delayed Orders
When using the Delayed Order functionality you can view orders, or orders with DO checked at the line item by going to Purchasing> Delayed Orders

Early Releasing of Delayed Orders
In the event you want to release a Delayed Order earlier than expected you can open the order and on the History tab, select Unlock Order

-
Then on the Header screen, uncheck “DO” delayed order.

-
Then you can use Release Management to release a shipper.
-
If there were any items that need be purchased by removing the DO those items will appear on Critical Purchasing to be purchased.
Helpful Dashboards & Alerts
Delayed Order Alert
-
In Admin> Administrator> Warehouse> Alerts

-
When you set this alert, users will receive an alert when there is a delayed order that has been converted where the lead time can not be met, based on the following criteria. Due Date - (Buffer Time +Lead Time)
PO Receipt Alert
-
In Admin> Administrator> Sites> Purchasing

-
Here you have two PO Receipt Alerts:
-
When a PO is received the PO writer will receive an email alert that it has been received.
-
When a PO is received the Sales writer will receive an email alert that it has been received.
-
Vendor PO Status Dashboard
The Vendor PO Status Dashboard will allow you to view your open POs at a glance that have yet to be received. You can click on the magnifying glass, as well to search for the PO number, or vendor name to help narrow your results as well.

From this view, the following Key information is displayed:
-
PO Number (hyperlinked)
-
Vendor Name
-
Order Date
-
Grand Total
-
Order Completed - check box
-
Date the PO was received completed
-
Warehouse Location
-
Ship to Name

As you drill into one of the POs you will be presented with the PO details.

If you need to make any changes to the PO, once again the PO number is hyperlinked and will open the PO in Savance. However, from this view, you can see all the details of the PO, what has been received and put away already. If there are any linked orders to this PO that will also be displayed here.
This is a very helpful tool, to quickly get the status of a PO that you are waiting for without having to drill down in the application.
Hard Linked PO’s Queue Dashboard
The Hard Linked POs queue is exactly that, anytime you have a hard-linked POs on an order, this information will be displayed here. Please Note the information is displayed per item that is hard-linked.
You can click on the magnifying glass, as well to search for the Salesperson, order, or PO number to help narrow your results as well.

At a glance, this widget displays the following information:
-
The Salesperson who placed the order
-
Linked Sales Order (hyperlinked)
-
Account Name
-
Linked PO Order (hyperlinked)
-
MFG
-
Part Number
-
Description
-
Install Location
-
The remaining qty yet to be received
-
The amount that has already been received
-
The received date
-
A quick hyperlink to the Release Management screen for that order, to allow you to release and allocate a shipper for that item, for staging or delivery,

As you select the hyperlink for the order you will get the full order details as well as items that have a hard link associated with them. If you need to view the order or linked PO in the Savance application just select the hyperlink and that order will open in the application.

As you select the hyperlink for the PO you will get the full PO details. If you need to view the linked PO in the Savance application just select the hyperlink and that PO will open in the application.

Lastly, when you see that the material has been received and you either wish to pick and stage your order or ship the order you can select the ‘Release Management’ link.

This will open the Release Management screen for that order, and from here you can release, steal, and or adjust the material to get it allocated to a shipper.
Account Order Status Dashboard
The Account Order Status Dashboard will list your sales order here. You can click on the magnifying glass, as well to search for the Order number, or account name to help narrow your results as well.

The at-a-glance view will show you the following information:
-
Order number (hyperlink)
-
Account name
-
Order Date
-
Order’s grand total
-
Balance Due on the order
-
Date the order was completed (shipped) checkbox
-
Date it was completed
-
Warehouse
-
Bill To Name
-
Release Management (hyperlink)

When select the the hyperlink for the order number you are presented with the order details.

If you need to open the order in the application, select the order hyperlink again. However, the order details will show you what has been shipped already, and what is still outstanding such as balances and material that still need to be shipped.
If there are any linked POs these will be listed at the line item as well.
Lastly, when you select the ‘Release Management’ hyperlink this will open up the release management screen for that order. Here you are able to do the same functions as if in the application, such as release, steal, and or adjust the material to get it allocated to a shipper.